The Schedule Appointment wizard is the customer's primary way to book a new service visit. It walks through five steps — Your info, Service, Date & Time, Details, and Review — and submits the appointment at the end.
Step 1 — Your Info & Address
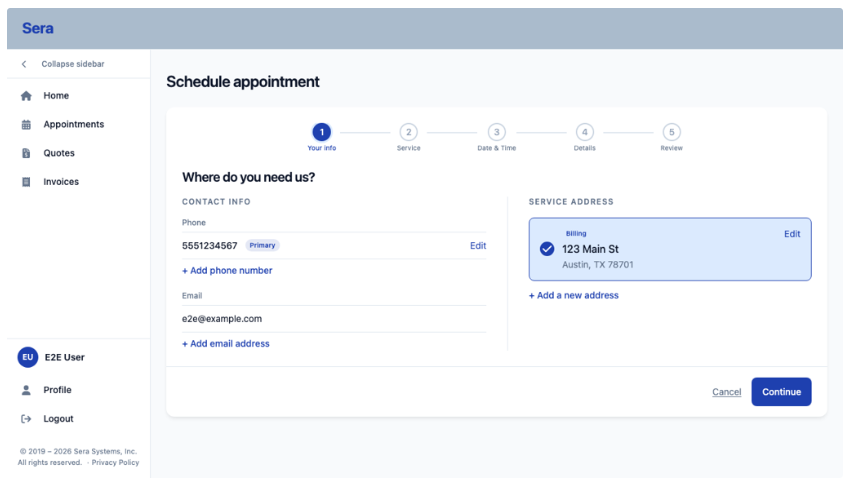
Saved addresses render as selectable cards (the primary one is badged "Billing"). The "+ Add a new address" modal validates the ZIP against the service coverage area; an out-of-coverage ZIP shows a warning with a call-us number and blocks saving.
Contact info on the left, selectable service-address cards on the right.
Step 2 — Service Category
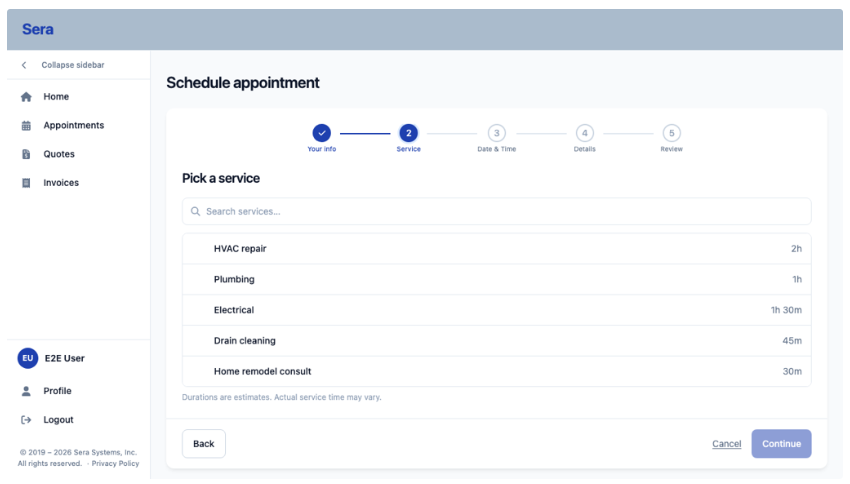
A searchable, scrollable list of service categories, each with an estimated duration.
Step 3 — Date & Time
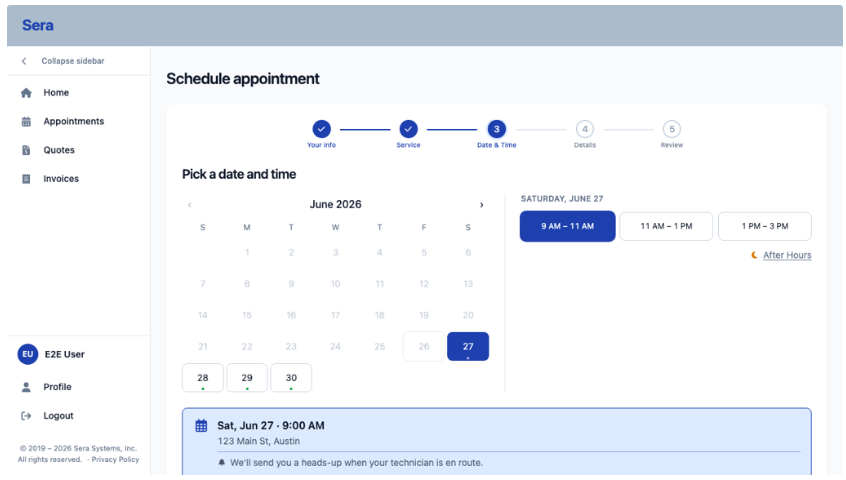
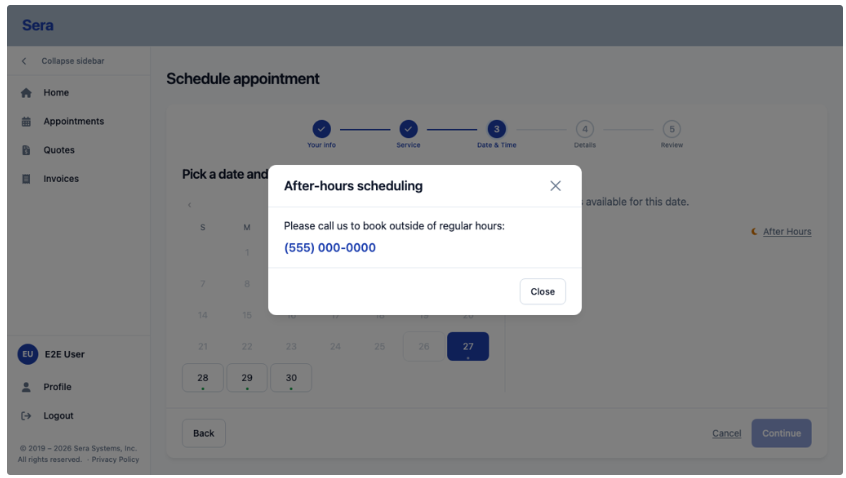
Calendar on one side, arrival-window slots on the other. Once a date and slot are chosen, a summary chip confirms the selection and notes that the customer will get a heads-up when the technician is en route.
Step 4 — Details & Media
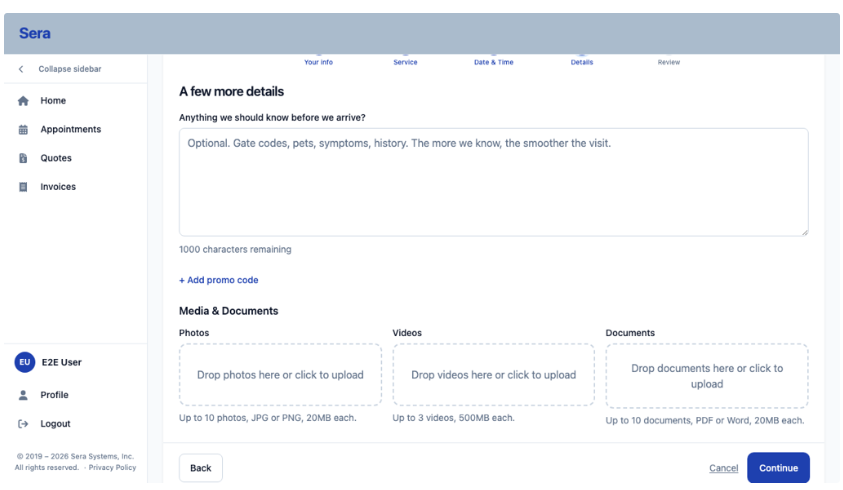
Optional category-specific fields render as dropdowns. Below are a notes box, a collapsible promo-code field, and photo/video/document uploaders with per-file progress.
Step 5 — Review & Confirm
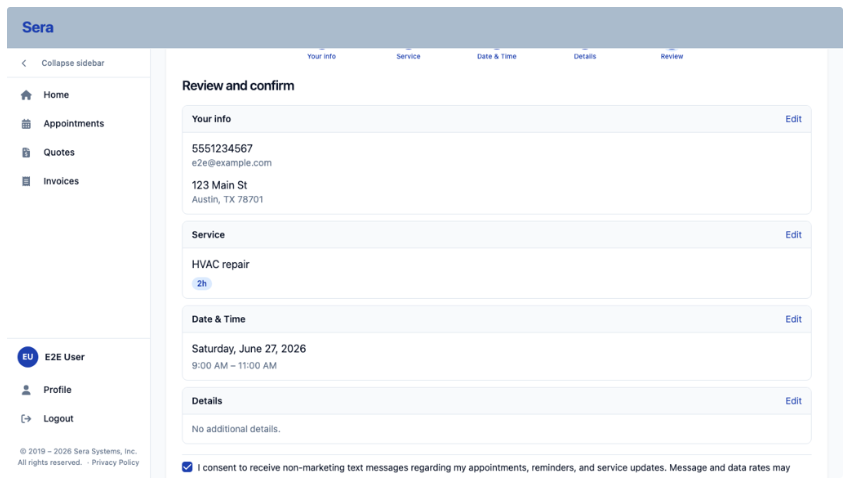
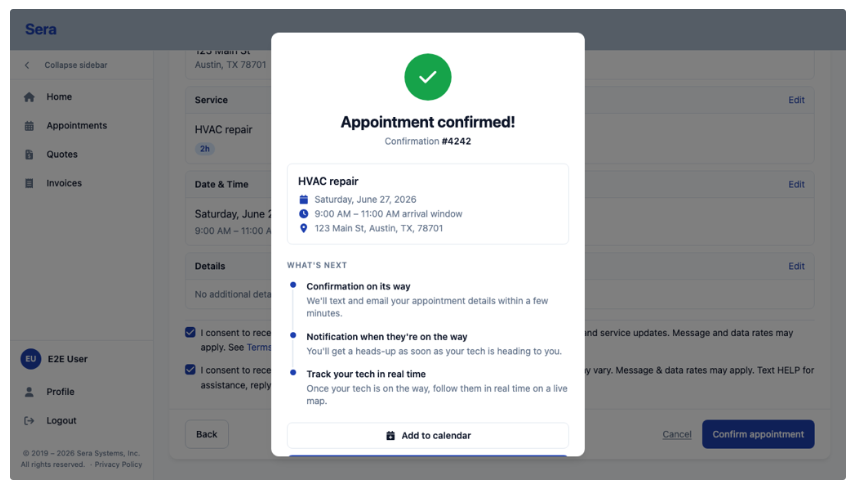
Summary cards recap Your info, Service, Date & Time, and Details, each with an Edit button that jumps back to that step. Two SMS-consent checkboxes default to checked (opt-out); confirming submits the appointment.