Users must provide the Sera Team with a copy of their data entered in our Data Templates to import data into Sera. To obtain the templates, you can email your representative for Onboarding if you have not yet launched, or help@sera.tech
Follow the instructions below to extract data from your old system.
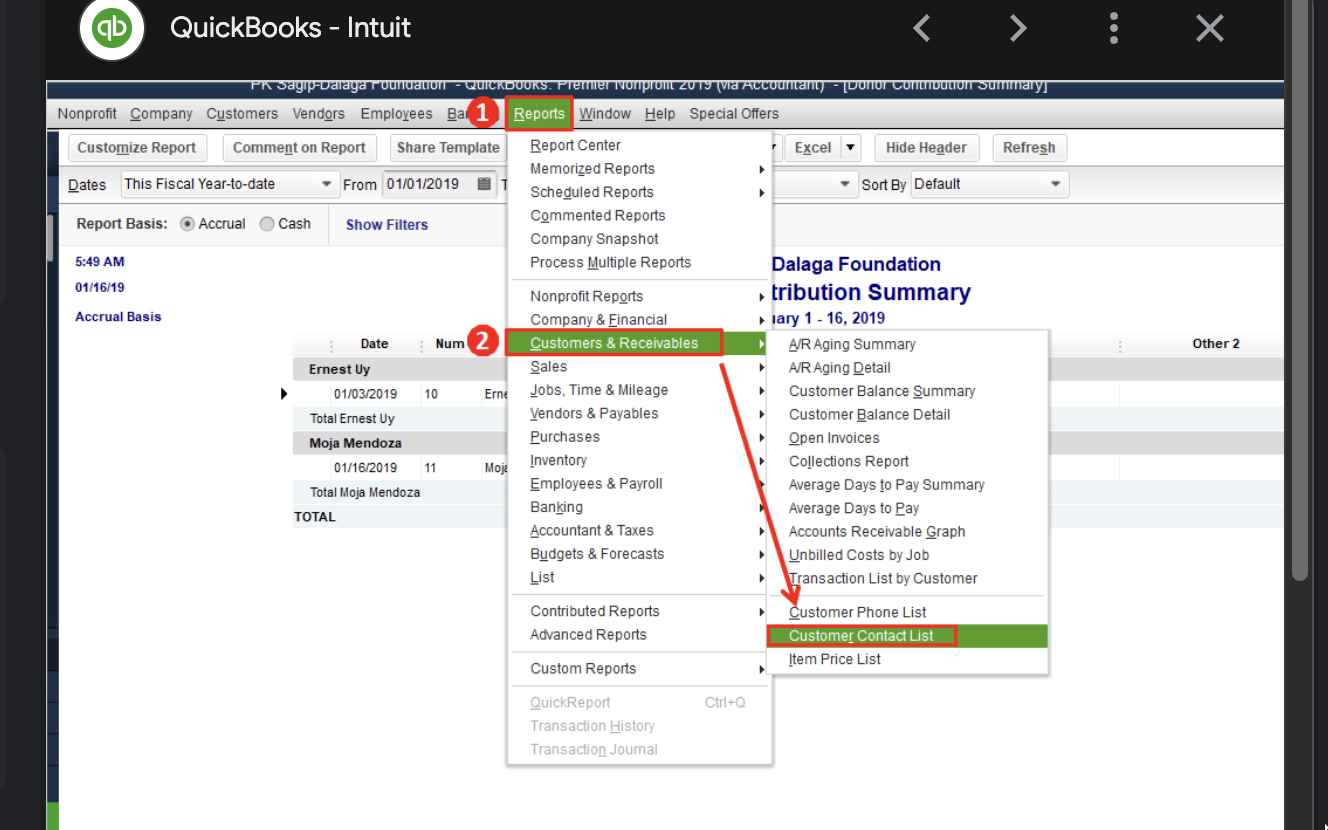
Quickbooks Desktop (Customer contact list and sales by customer detail)
Customer Contact List
Access Reports --> Customers & Receivables --> Customer Contact List
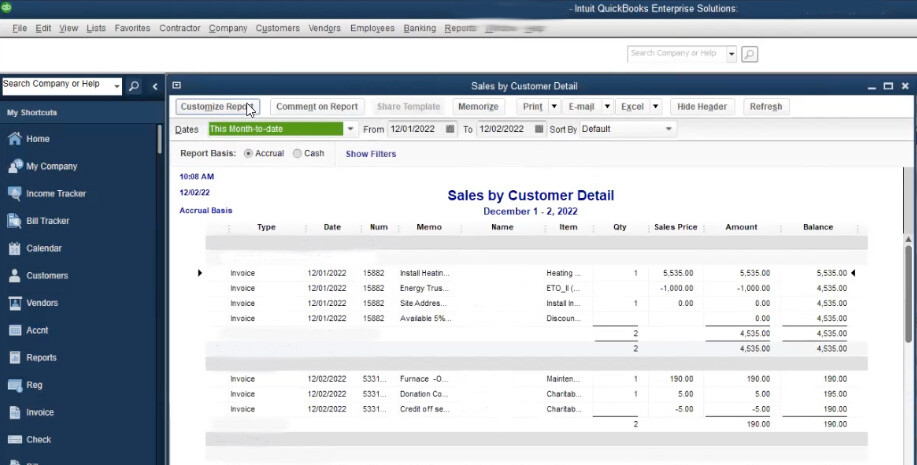
Select Customize Report and select all columns and any date range that the customer would like imported into Sera.
Export to Excel following the instructions below.
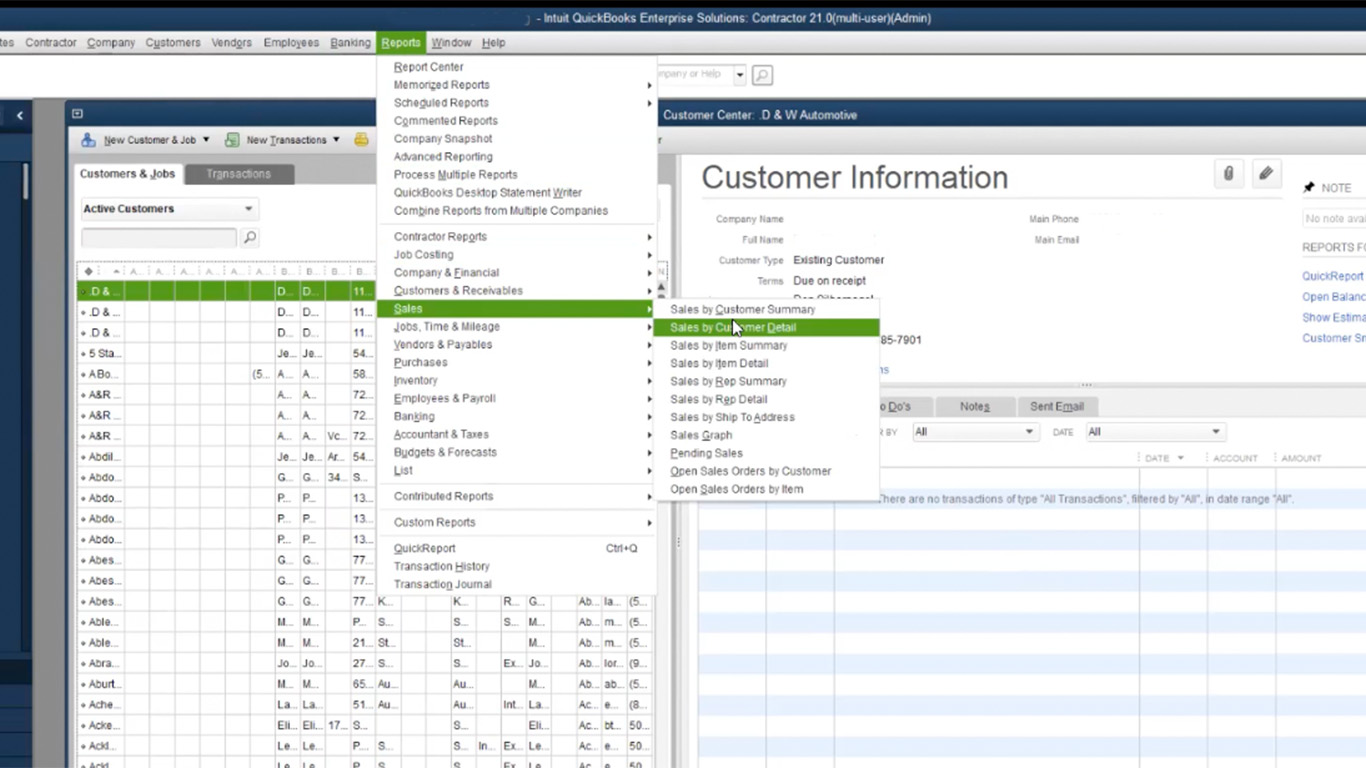
Sales By Customer Detail
Access Reports --> Sales --> Sales by Customer Detail
Select Customize Report and select all columns and any date range that the customer would like imported into Sera.

Export to Excel following the instructions below.
Export a report as Excel in QuickBooks
QuickBooks Desktop for Windows
Go to Reports, then Reports Center.
Find and double-click the report you want to export.
Select the Excel ▼dropdown, then Create New Worksheet
If you see a message that says your report has too many columns, select Advanced, then uncheck the Space between columns checkbox. Select OK.
When you’re ready to export, select OK.
QuickBooks Desktop for Mac
You can open the Excel workbooks with Apple Numbers v3.5 or Microsoft Excel 2016 or later, including Mac Office 365.
Go to Reports and find the report you want to export.
Select Export.
When the file opens, select File, then select Save As to save the file where you want it.