
Forms & Checklists
We're excited to introduce a long-requested update: the ability to build your own forms and checklists directly in Sera.
If your business runs on paper checklists or a spreadsheet template, whether that is a maintenance checklist, a safety sign-off, an equipment inspection, or a photo you always need before a job closes, you can now build it in Sera. It attaches to the right jobs, your Technicians complete it in the field, and your Customer receives a finished PDF.
What's Included
Admins can:
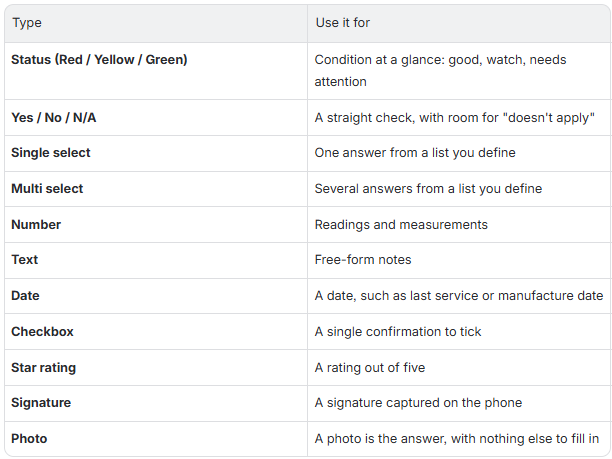
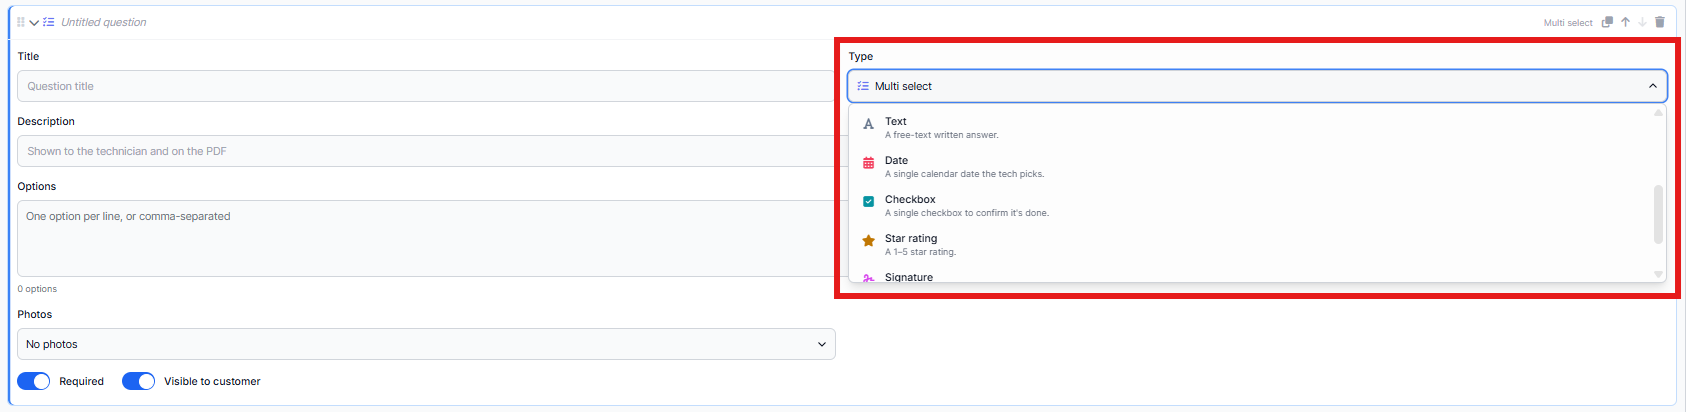
- Build forms in Company › Forms & Checklists with a drag-and-drop builder, using sections, questions, and eleven question types.
- Set rules per question: required, customer visible, and photo requirements with a minimum count.
- Target a form by Department and Service Category, or attach it to every appointment.
- Require a form to be completed before a job can close.
- Preview the Customer's PDF before publishing.
- Duplicate an existing form to start from.
- Review, amend, and archive completed forms from the Job or the Customer's profile.
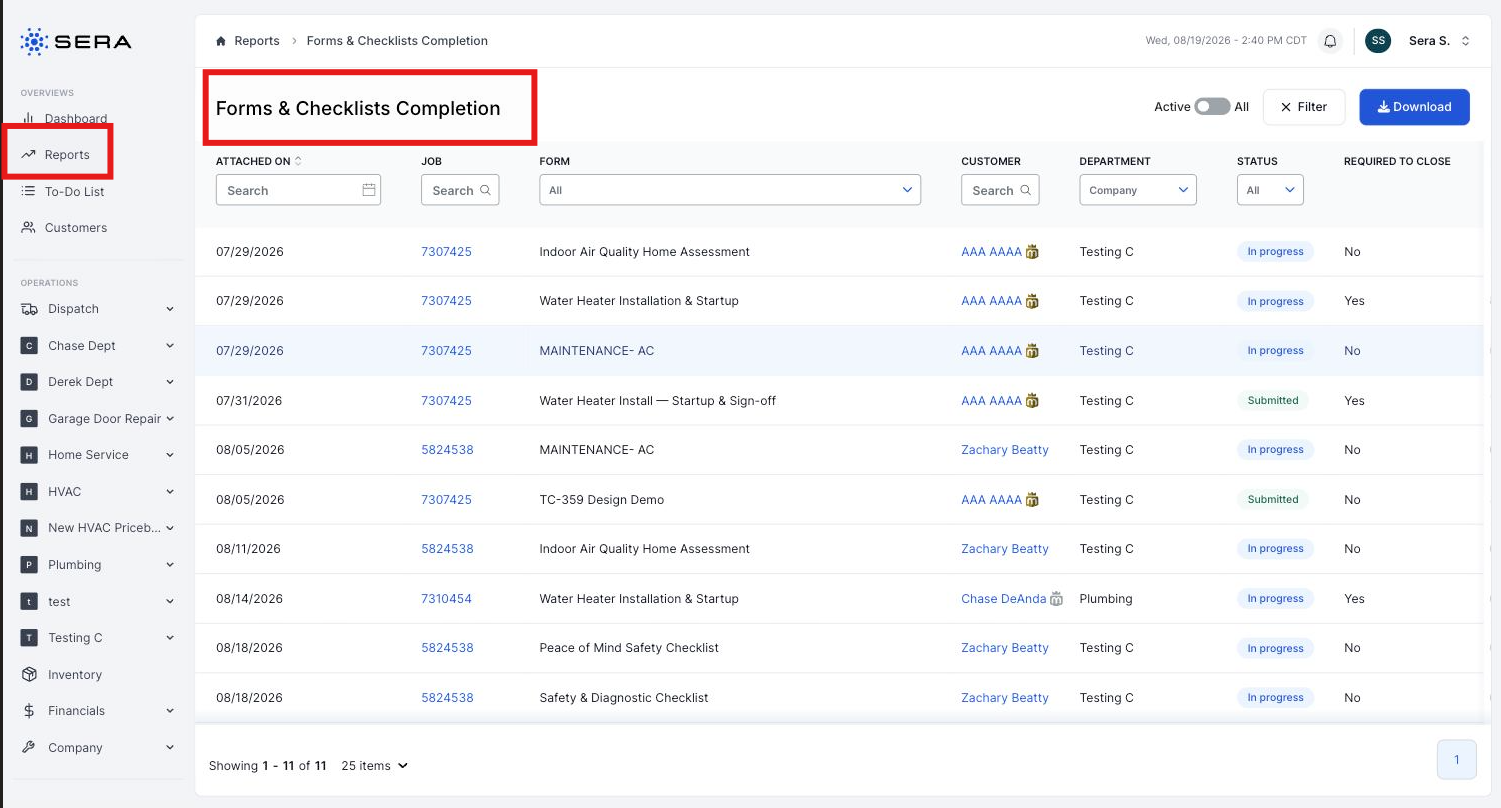
- Track completion across the business in the Forms & Checklists Completion report.
Technicians can:
- See every form attached to a job in the Sera Mobile App, and complete them as they work.
- Attach photos to any answer, either new photos or ones already on the job.
- Capture signatures.
- See what is outstanding when a required form blocks close-out.
Customers receive:
- A PDF of the completed form, filed on the job and emailed the same way invoices and quotes are sent. Internal-only questions are excluded.
Where to Find It
|
What |
Where |
|---|---|
|
Build and manage forms |
Company › Forms & Checklists |
|
Forms on a specific job |
The Forms & Checklists tab on the Job |
|
Every form for one Customer |
The Forms & Checklists tab on the Customer's profile |
|
Completion across the business |
Reports › Forms & Checklists Completion |
|
The finished PDF |
The job's Media & Docs tab |
|
Customise the email |
Company › Settings › Email Templates |
How It Works
Building a Form
Step 1. Create it
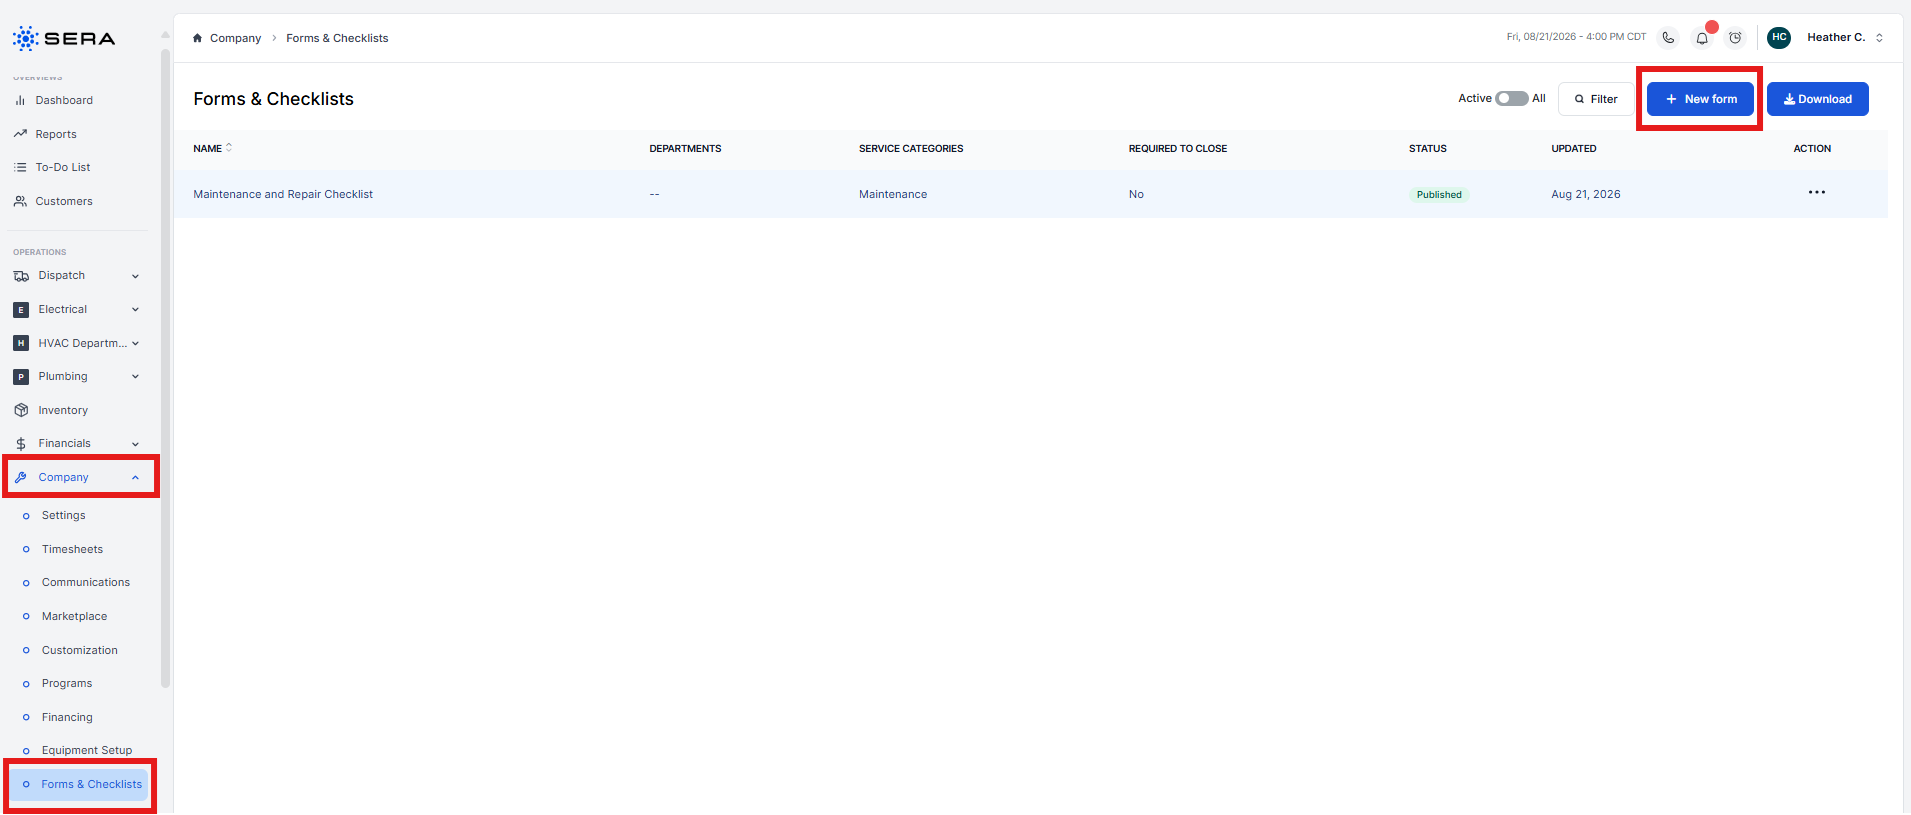
Go to Company › Forms & Checklists. You'll see your library of forms and a + New button. You can also duplicate an existing form from the library if you're building something similar.
Step 2. Add sections and questions
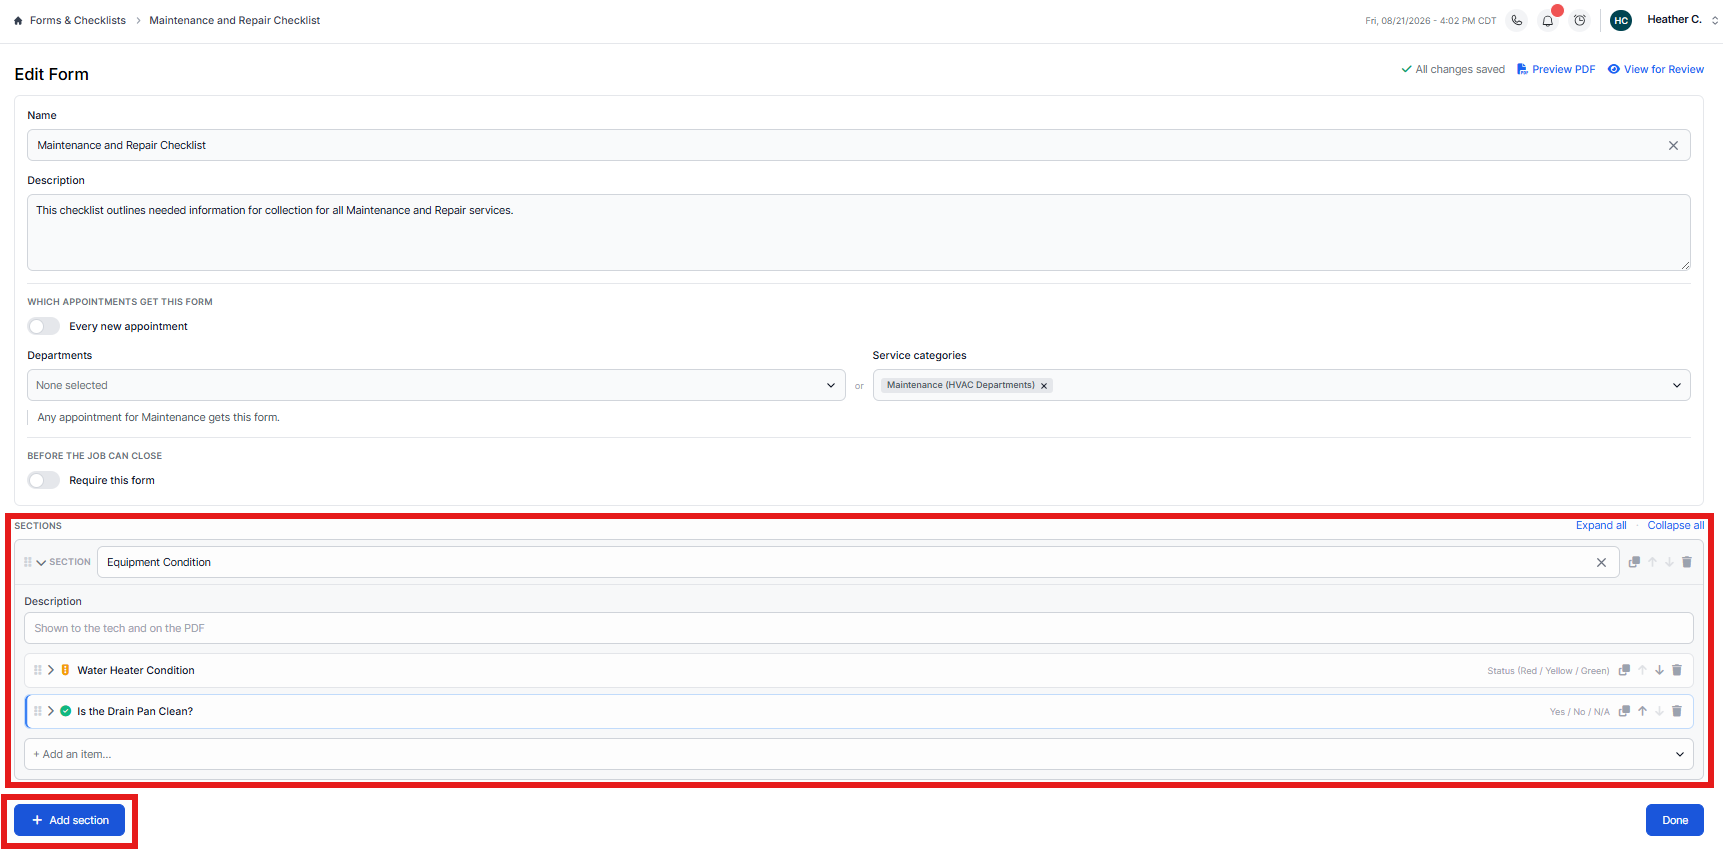
Give the form a name, then build it up in sections. Sections group related questions, such as Outdoor Unit, Indoor Unit, and Electrical, and you can drag both sections and questions into any order.
Every line is one question. Click a question to expand it and set it up.
Step 4. Set the rules on each question
Three settings, on every question:
- Required. On by default. The question must be answered. If the form is also marked required-to-close, a blank required question is what blocks the job.
- Customer visible. On by default. Turn it off for internal questions, and they stay off the Customer's PDF and out of the Customer-facing report.
- Photos. No photos, Optional photos, or Required photos. With required photos you also set a minimum number.

Step 5. Say where the form belongs
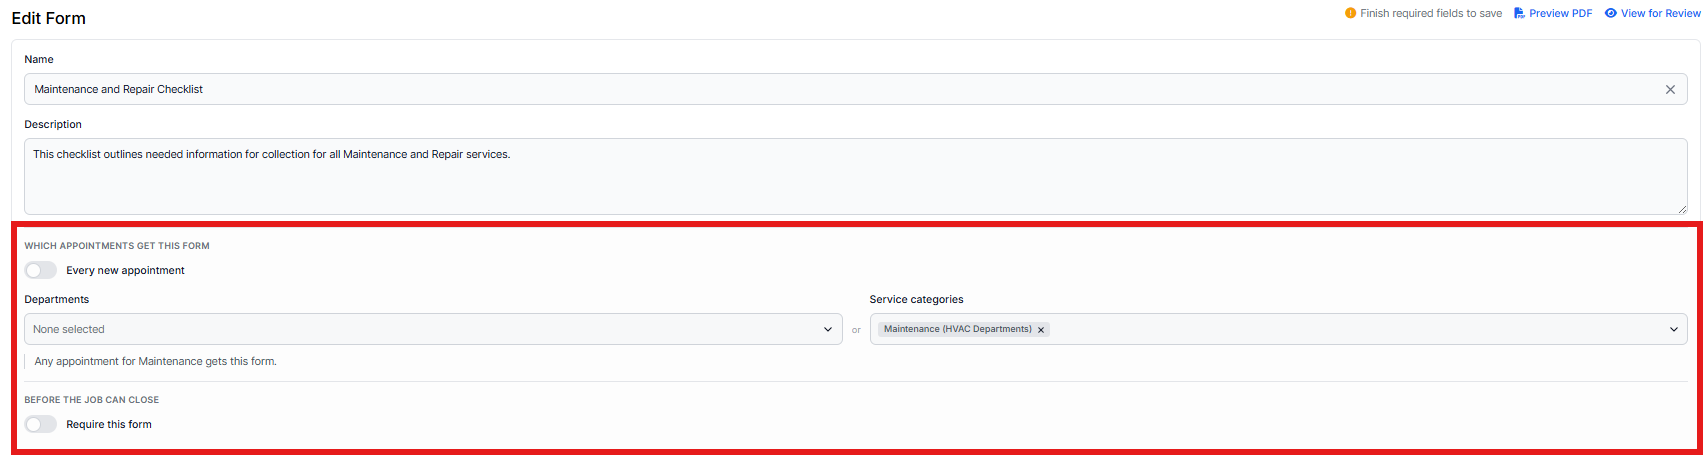
At the top of the builder, choose the Departments and Service Categories this form applies to. That targeting is how Sera knows which jobs need it.
If a form should go out on every appointment no matter the work, turn on Attach to every appointment. The Department and Service Category pickers switch off, because they are no longer doing anything.
Step 6. Decide whether it blocks close-out
Turn on required to close if a Technician should not be able to close a job until this form is finished. See Requiring a Form Before Close-Out below.
Step 7. Preview and publish
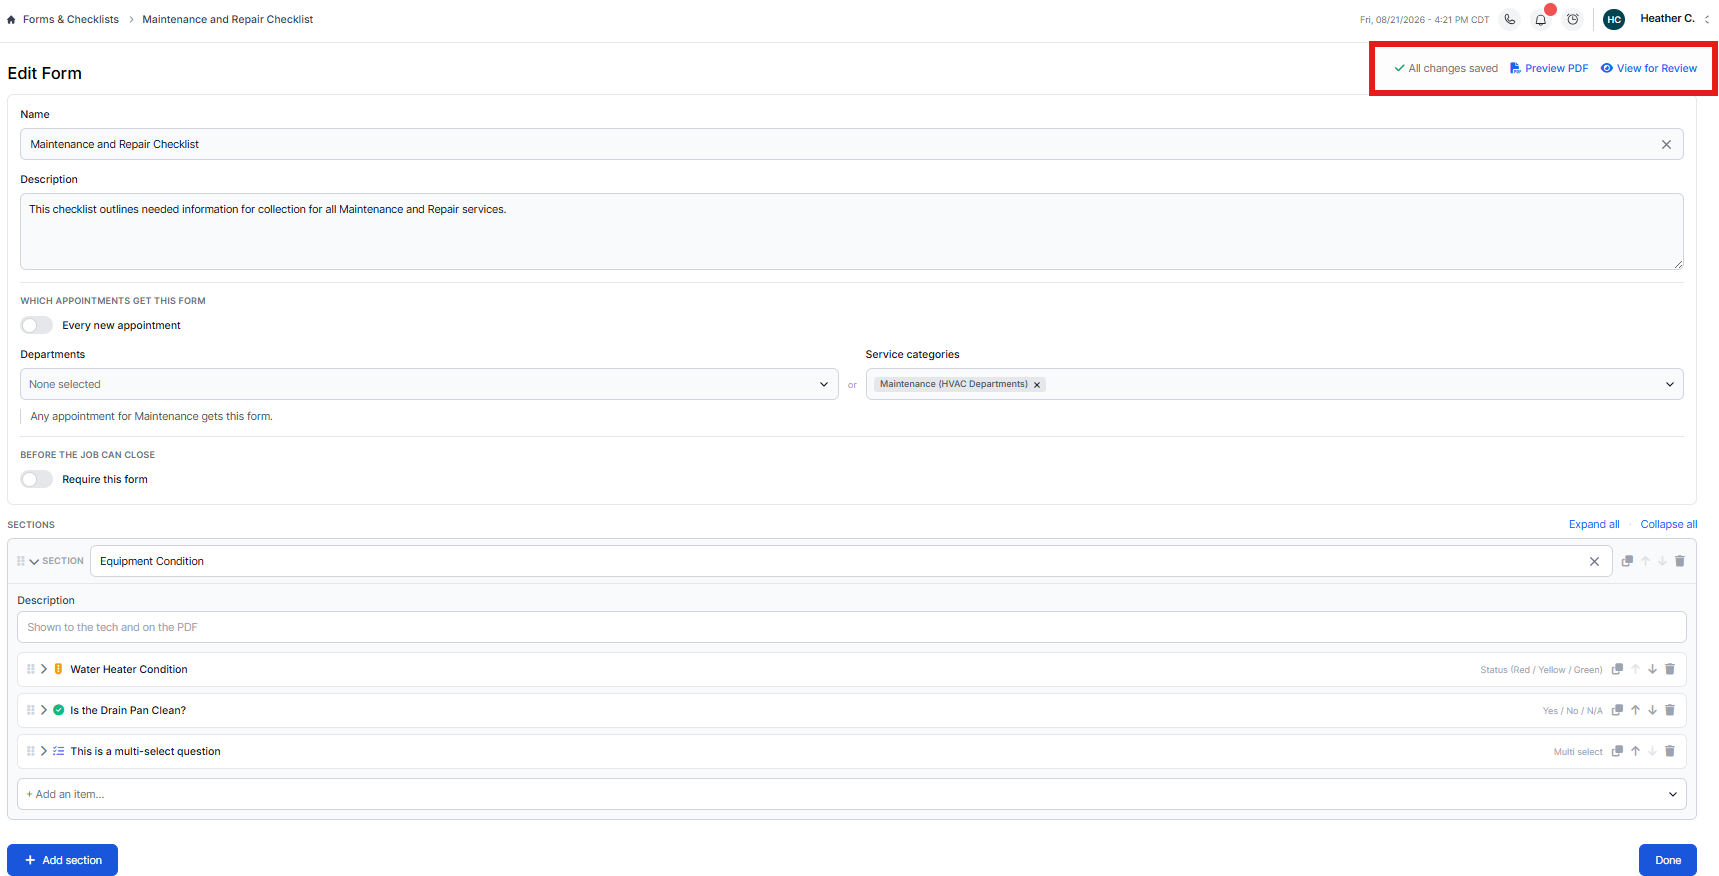
Preview the Customer's PDF from the builder to check what they will actually receive, then Publish. Only published forms attach to jobs.
How A Form or Checklist Reaches a Job
-
Automatically. When an appointment is booked on a job, Sera attaches every published form whose Department and Service Category match the work, along with any form set to attach to every appointment. Nothing needs to be selected at booking time.
-
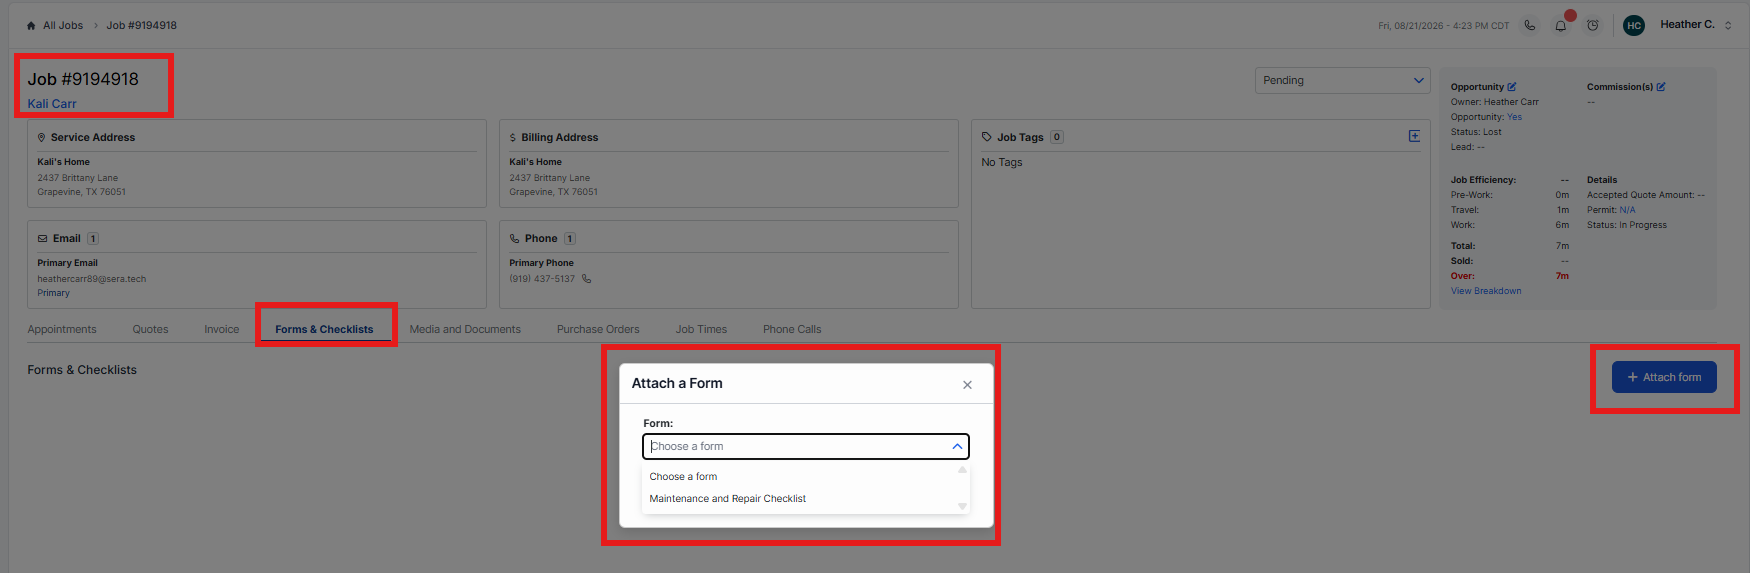
By hand. From the job's Forms & Checklists tab you can attach any published form at any time. Use this for a one-off inspection that isn't part of your standard workflow.
Requiring a Form or Checklist to Close a Job
When a form is marked required to close, a Technician can't close the job until it is submitted.
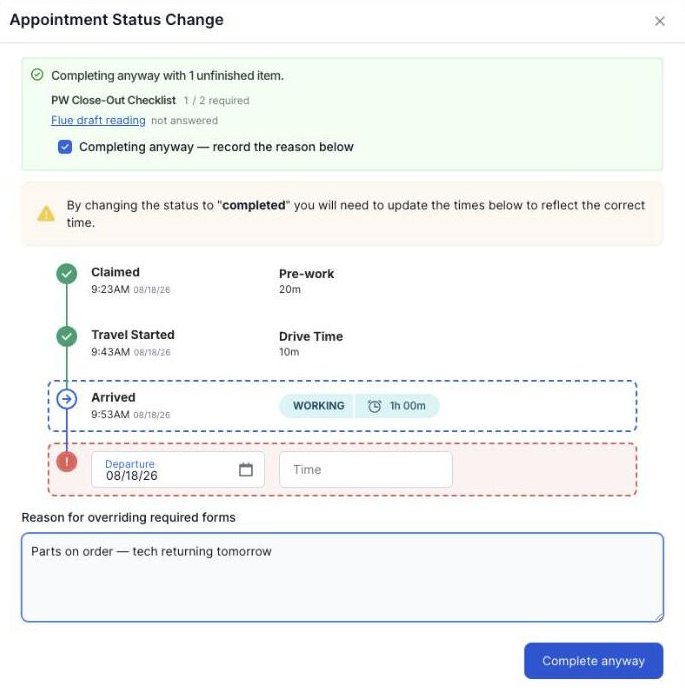
If they try, Sera blocks the close-out and lists what is outstanding, naming the unanswered questions and the missing photos, so it can be fixed while they are still on site.
If something can't be completed, an Admin can close the job anyway. The override asks for a reason, and that reason is recorded on the job, so there is a record of why the form was waived.
Technicians cannot override the block themselves. That is intentional, since the point of the gate is that the person on site can't skip it.
What Your Customer Receives
When a form is submitted, Sera renders it as a PDF and files it into the job's Media & Docs tab automatically.
Sending it to the Customer is a separate step, the same as sending an invoice or a quote. You choose when it goes out, and you can customise the email under Company › Settings › Email Templates.
Anything you marked not customer visible is excluded from the PDF entirely.
Reporting
Reports › Forms & Checklists Completion shows where every form stands across the business, by job, Customer, Technician, and status, so the office can see what is outstanding without opening jobs one at a time. It filters, sorts, and exports like every other report in Sera, and you can include archived forms when you need the full history.
Other Items
Archiving
An Admin can archive a form off a job when it was attached in error or is no longer needed. Archiving keeps the record rather than deleting anything, and archived forms can be shown again in the report using the Include Archived filter. An archived form stops blocking close-out.
Amending a completed form
An Admin can amend a submitted form from the Job. Amendments are audited, so there is a record of what changed and who changed it.
Other Items
"I built a form but it isn't showing up on any jobs."
- Check that it is published. Draft forms never attach.
- Check its Department and Service Category against the job. If they don't match the work, it won't attach.
- Forms attach when an appointment is booked on the job. A job with no appointment yet has nothing to attach to, so either book the appointment or attach the form by hand from the job's Forms & Checklists tab.
"The form attached, but my Technician can't see it in the app."
- Have them close and reopen the app to pick up the latest version.
- Confirm they are looking at the right job, and that the form was not archived off it.
"My Technician can't close the job and doesn't know why."
- The block lists what is outstanding. Have them read it, since it names the unanswered questions and the missing photos.
- The most common cause is a required photo with a minimum count that has not been met.
- If it can't be completed, an Admin can close the job with an override and a reason. Technicians can't do this themselves.
"A form got attached to the wrong job."
- An Admin can archive it off that job. The record is kept, and it stops blocking close-out.
"The Customer says the PDF is missing a question they discussed."
- Check whether that question is set to customer visible. If it is off, the question is excluded from the PDF by design.
"Do I have to send the PDF, or does it go automatically?"
- It is filed on the job automatically. Sending it to the Customer is a separate step, the same as an invoice or a quote. Nothing goes out until someone sends it.